Showing posts with label geeky stuff. Show all posts

Jan 24, 2021

DIY Dinosaur Necklace & Jurassic Park Shoot feat. Luloveshandmade

 
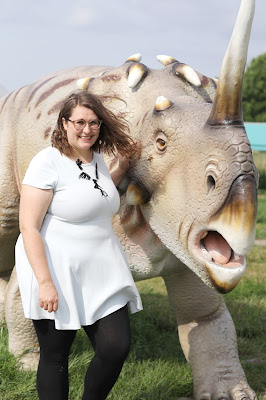
Let's just ignore the fact, that this post is also a couple of years in the making as well as the Star Wars Art Print Post from a month ago. We won't ignore the fact that my dear Lu from Luloveshandmade already made 2 posts about our trip to Jurassic Park. Check those out HERE and HERE! She also posted about a permanent Dino Park near Berlin. All of the Dino Park photos are by her, except for the last one.
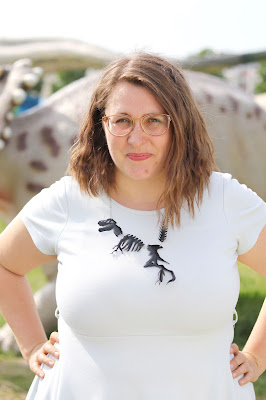
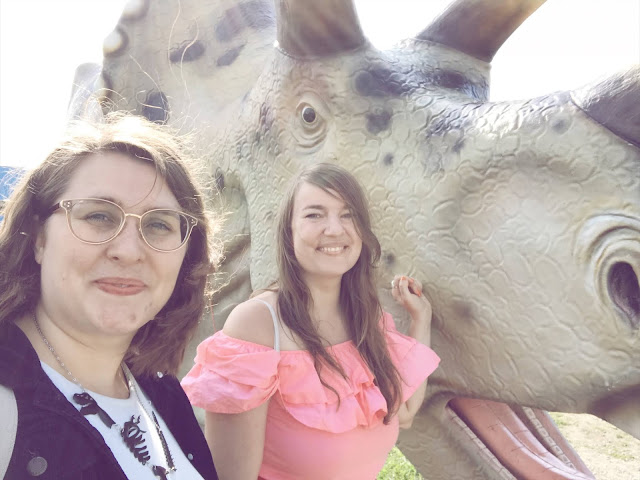
So one late summer day in 2018 Lu and I went to a temporary dinosaur exhibit in Berlin. The most awesome part? You could climb on the Dinosaurs. So fun! Of course I had to bring my most recent diy, this awesome dinosaur skeleton necklace made from shrink plastic. 
~
Wir ignorieren mal den Fakt, dass dieser Post auch schon ein paar Jahre auf seine Veröffentlichung wartren musste, genau wie der Star Wars Kunstdruck Post von vor einem Monat. Wir ignorieren aber nicht, dass meine Liebste Lu von Luloveshandmade bereits 2 Posts zu unserem Trip nach Jurassic Park verfasst hat. Schaut mal HIER und HIER! Zusdätzlich gibt es bei ihr auch einen Post zu einem permanenten Dino Park nahe Berlin. Alle Dino Park Fotos außer dem letzten sind von ihr.
Es begab sich also an einem Spätfrühlingstag im Jahre 2018, dass Lu und ich diese temporäre Dino Ausstellung besuchten. Der beste Teil daran? Man konnte auf die Dinos raufklettern. So viel Spaß!
Natürlich musste ich passend dazu mein letztes DIY mitnehmen, diese großartige Dino Skelett Kette aus Shrink Plastik.
//
And here's how I made it: ~ Und so habe ich diese gebastelt:


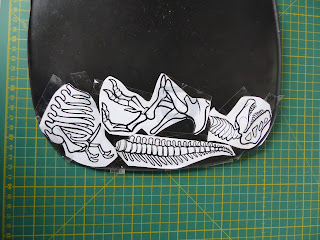
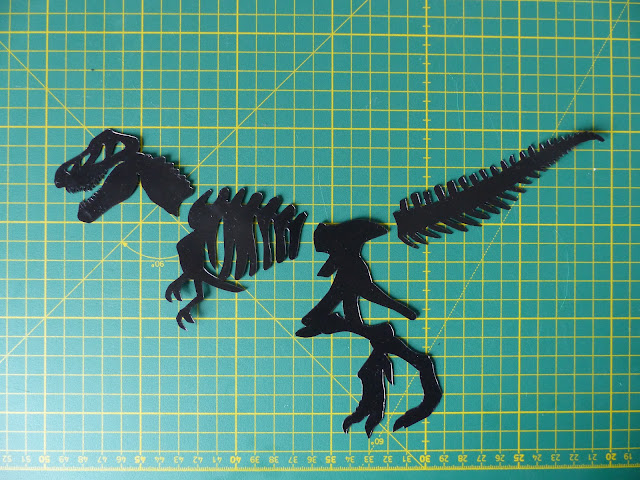
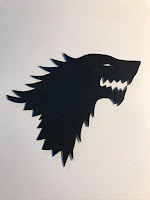
It begins, as most good stories do, with a take out dinner, Sushi, to be specific. And most Sushi take out comes in plastic boxes marked with No 6 plastic. This is very important! Only plastic no 6 will work as shrink plastic. So I printed out a picture of a dinosaur skeleton and cut it into pieces where I would want my necklace to be connected with rings. I cut those parts out with a scalpel and also made a direwolf, Tina from Bobs Burgers and Sherlock to make pins or magnets.
The skeleton parts then got holes for the necklace rings, it's important to do this before melting the plastic.​
Then heat your oven to 325°F (ca.170°C), and place your plastic in the center of a baking sheet. Once the oven is preheated, place the baking sheet on the top rack. After a bit, the plastic will curl, shrink, and then flatten out. Which is when you want to remove the baking sheet immediately.
I put a heavy book on my shrinky dinks while cooling down, because the black plastic is a bit more complicated than the seethrough one, but it worked out.
Then attach rings, chain & lock and we have a necklace. 
~
Es begann, wie viele gute Geschichten, mit einem Take Out Abendessen, Sushi im Speziellen. Und die meisten Sushi Take Outs kommen in einer Plastik Box marktiert mit einer Nr.6. Das ist sehr wichtig, denn nur Nr.6 Plastik kann als Shrink Plastik verwendet werden. Das Dinosaurier Skellett habe ich mir ausgedruckt und so zerteilt, wie ich es an der Kette später mit Ringen verbinden wollte. Die Teile habe ich dann mit einem Skalpell ausgeschnitten, dazu noch einen Schattenwolf, Tina von Bobs Burgers und Sherlock um Pins und Magneten zu basteln.
Die Skelett Teile habe ich dann noch mit Löchern versehen, es ist wichtig, dies vor dem "schrumpfen" im Ofen zu tun.
Den Ofen heizt man auf 170°C (ca. 325°F) hoch und platziert die Plasstik Teile in der Mitte eines Backblechs. Dieses Backblech kommt nach dem Vorheizen auf die höchste Ebene. Nach kurzer Zeit wird sich das Plastik verformen, schrumpfen und dann wieder flach liegen. Direkt danach wird das Blech aus dem Ofewn entfernt. Ich habe auf meine Plastikteile zum abkühlen eine schweres Buch gelegt, weil das schwarze Plastik eine wenig widerspenstiger als das durchsichtige ist, aber es hat trotzdem funktioniert.
Dann nur noch Ringe, Kette & Verschluss befestigen und wir haben eine Kette.
//
Bute now to the good part, our Dino Park Adventure Shoot ~ Aben nun zum spannendsten Teil, unserem Dino Park Abenteuer Shoot


A bunch of thanks to Lu from Luloveshandmade for the amazing pictures and a blast of a time!
~
Herzlichen Dank nochmal an Lu von Luloveshandmade für die fantastischen Fotos und einen wundervollen Tag!

Dec 21, 2020

AT-AT goes Warhol - DIY Star Wars Linocut Print

         
Jeez, this post has been in draft for ages. Finally getting some free time to vitalize the blog again!
I made these AT-AT prints a while ago and put them together as a Warhol like painting for a dear colleague of mine. And this is how I made it.
/
Menno, dieser Post war so lange in meinen Entwürfen. Endlich hab ich ein wenig mehr Zeit um den Blog wiederzubeleben.
Die AT-AT prints habe ich vor einer Weile erstellt und sie dann zu einem Warhol ähnlichen Gemälde zusammengebracht für einen sehr lieben Kollegen. Und so ist es entstanden:


The linoleum is actually from when our offices were redone at work. There was a bunch leftover, so I took some to make lino prints. I had the lino tools from making our Save The Date wedding stamp and we had just watched the LEGO movie, so I had to make a LEGO spaceman and the AT-AT.
/
Das Linoleum ist tatsächlich aus meinem Büro auf Arbeit als die Böden erneuert wurden. Es war so viel davon übrig geblieben, dasss ich ein paar Reste für Linolschnitte mitgenommen habe. Das Werkzeug dafür hatte ich noch von dem Save The Date Hochzeitsstempel und wir hatten grad den LEGO Film geschaut,. dass ich einen LEGO Raumfahrer und den AT-AT geschnitzt habe.

          
Many print tries later I had a bunch of more or less nice lino prints that were ready to be made into a picture. I put them on a big piece of paper and into a recently thrifted picture frame, but the paint had made the paper very crinkly and it just wasn't working right.
/
Einige Druckversuche später hatte ich einige mehr oder wenig anschauliche Linoldrucke, die bereit waren zu einem Bild zusammengebracht zu werden. Ich hab die Bilder auf einen großes Blatt Papier geklebt und in einen kürzlich vorher Second Hand erworbenen Rahmen platziert, aber die Farbe hatte die Blätter so stark Wellen schlagen lassen, dass es einfach nicht richtig aussah.


So I got out the watercolor paint and smothered the whole painting with lots of water and a bluegreen paint that matched the AT-ATs and flattened it out while drying with out heavy toolboxes.

Also hab ich die Wasserfarben rausgeholt und das ganze Bild mit Wasser getränkt in einer blaugrünen Farbe passend zu den AT-ATs. Platt und trocken gemacht wurde das ganze dann mit Hilfe unserer schweren Werkzeugkisten.

And it's done! Well, it was done, a couple of years ago now ;) May the Force be with you nerdy Nerds <3 And Merry Christmas, happy Hannukah & a joyous Kwanzaa. Happy Holidays everyone!
/
Zack fertig! Nun ja, fertig war es schon vor einigen Jahren ;) Möge die Macht mit euch sein, ihr nerdy Nerds <3
Und frohe Weihnachten, schönes Chanukka & ein wunderbares Kwanzaa. Frohe Feuertage euch allen!

Nov 15, 2020

May the Craft be with You ~ Nerdy Weihnachtswichteln // Secret Santa 4.0


Last Christmas was the biggest nerdy Secret Santa so far in my DIY facebook group May the Craft be with You. We found another 16 nerdy crafters to exchange handmade gifts for the holidays. And let me tell you, these crafters are talented, but see for yourself!
/
Letzte Weihnacht gab es das bisher größte nerdy Weihnachtswichteln in meiner DIY Facebook Gruppe May the Craft be with You. Wir haben ganze 16 nerdy Bastler gefunden um ihre handgemachten Geschenke auszutauschen. Und was für Geschenke das waren, aber schaut selber!

I received this awesome package including the Dobby Christmas card, a Smaug fairy light jar, a bird feeder made from a flower pot with all my favorite fandoms (which I'm going to reuse this year) and some Harry Potter soaps.
/
Ich hab dieses tolle Paket erhalten: eine Dobby Weihnachtskarte, eine Smaug Lampe mit Lichterkette, eine Vogelfutterstelle aus einem Blumentopf dekoriert mit meinen liebsten Fandoms (die ich dieses Jahr wiederverwenden will) und ein paar Harry Potter Seifen.

~~~

Here's all the other crafty packages:
/
Und hier findet ihr alle anderen Wichtel-Pakete:


Of course I participated with a few crafty pieces as well. My Secret Santa partner was a big Bob's Burgers Fan, so I took a piece of birch from the tree we had just felled and used my wood burner to burn a picture of Bob Belcher himself with a very fitting quote for the holidays. I completed the family with a melting bead Gene in his Burger costume and a shrink foil Tina. The Simpsons cup was a thrift find and the Disney foam stickers have been in my crafting collection for a while now, so it was time for a new owner.
/
Natürlich habe ich selber auch ein selbstgebasteltes Paket beigesteuert. Mein Wichtelpartner ist ein großer Bob's Burgers Fan, also hab ich das als Hauptthema genommen. Ich habe ein Stück der frich gefällten Birke ausgesägt und mit meinem Holzbrenner den Familienvator Bob Belcher höchstpersönlich eingebrannt. Das Zitat fand ich sehr passend für die Weihnachtstage ;)
Die Familie wurde komplettiert mit einem Bügelperlen Gene und einer Schrumpffilien-Tina. Die Simpsonstasse habe ich auf einem Trödelmarkt gefunden und die Disney Schaumsticker waren schon seit Ewigkeiten in meiner Bastelsammlung, also höchste Zeit für einen neuen Besitzer.
~~~
Anyone who wants to join us for this year's Secret Santa should hurry up, because we will decide on partners this Saturday, November 18th. Stop by the group anyways if you want to see what kind of creative gifts will be exchanged: May the Craft be with You

Wer dieses Jahr bei unserem Weihnachtswichteln mitmachen will sollte sich beeilen, denn wir losen am Samstag, den 18.11. bereits unsere Wichtelpaare aus. Schaut ansonsten gern in der Gruppe vorbei um zu sehen, was es dieses Jahr für kreative Geschenke gibt: May the Craft be with You
Related Posts Plugin for WordPress, Blogger...